Command-line warriors, part one

TerminalThis is a post about some things you might have used a graphical tool for in the past, but which can be done just as well using command-line tools. Since I keep finding these little gems I hope I can continue this kind of post in the future. I’ll try to categorize the tips and I’ll only post the functionality I recently discovered and use myself, so this is not a reference for any of the programs mentioned.

Photography

You accidentally selected “Delete All” on your digital cameras and now your photos are gone? You even fear they might have been overwritten by photos taken after the accident? Fear not, the same thing happened to me, and I was able to restore all the photos from the event plus photos going back as far as three months from my CF card in my 400d using the PhotoRec software.

Cameras today often have an orientation sensor, so pictures taken in portrait mode will automatically be rotated. But this usually happens in the viewer, while the orientation is simply an EXIF tag. Of course this takes up precious computing time and not every viewer supports it. jhead can not only display EXIF information in a consistent manner but can also rotate pictures lossless and clear the orientation-tag afterwards. The call is jhead -autorot *.JPG

If you want to rename your images using EXIF-information, exiftool is the way to go. The command exiftool '-FileName<Party_ ${CreateDate}_${filename}' -d %Y%m%d *.jpg would prefix all the photos with “Party” and the create-date, while keeping the original filename as the suffix. exiftool can shift dates too, if you ever forget to adjust for daylight saving.

When uploading the images you’ll often want to resize them. The ImageMagick collection can do just that, and many other things (like sharpening etc.). If you mogrify -resize 1600x1600 your photos will be resized to 1600px maximum edge length, while keeping the ratio. But be careful, mogrify overwrites the pictures in place!

Music

Thanks to services like video2mp3.net/ you can download a lot of music from YouTube. But sometimes there is silence at the end or the beginning of a song, and a whole collection of songs might have differing levels of volume. To cut an mp3 you can use mp3splt like this to cut everything after 03:30 minutes:mp3splt file.mp3 00.00 03.30The sound levels can be normalized, losslessly, using mp3gain:mp3gain -rk *

Misc

When pretty-printing flat text files I use a2ps to format them nicely and get a PostScript-document. a2ps however does not support UTF-8, while the only characters I care about (German Umlauts) can be represented using Latin1 just fine. So, one can use iconv to convert them on the fly like this:iconv --from-code=UTF-8 --to-code=LATIN1 textfile.txt|a2ps --font 9 -E -B -r --column=1 > out.ps

To export images from a PDF-file I discovered pdfImages, which is part of the xpdf-suite. Use it like this:pdfimages -j foo.pdf bar
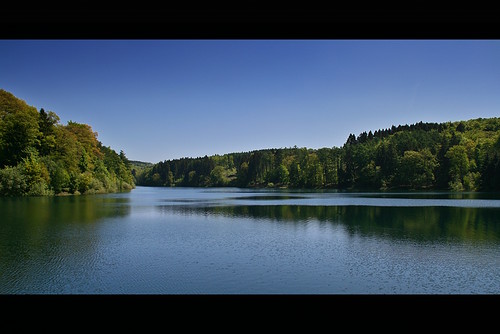
Hiking around the Eschbachtalsperre

Some post-processing

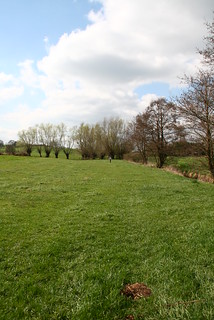
Believe it or not, this photo was taken about 2km from my parents home, from the dam of the Eschbachtalsperre, a dam for providing the region with drinking water. Usually I just jog around the lake in the morning, but last weekend Katrin and I discovered one of multiple hiking routes around it and the surrounding area. The trails all start at the parking lot and are clearly marked along the way.

I uploaded this shot along with other shots to flickr, but then decided to go back and give it a little more depth in Gimp (using Contrast/Saturation, Sharpen, a Tone-Mapping plugin and a gradient for the sky).

CCed photos, still a lot of fun

Let me see those handsI’ve been keeping track of my CCed photos for a while now, updating the list of people that use my flickr-photos on a regular base. Today I did another round, simply by googling “heipei flickr”. Not surprisingly I came up with about 12 new websites and blogs. And I’m happy that people are discovering my more advanced photos as well, instead of using old and embarrassing snaps from my mobile phone.

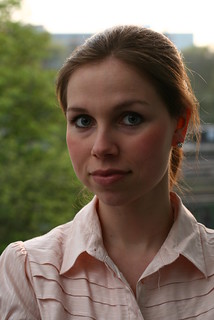
The shot on the left was done after Katrin asked me for some photos to illustrate a blogpost related to medicine over on her blog. Some other site apparently had the same idea, and now this photo can be found here, here, here and here. This was not only rewarding for me but also interesting since I discovered (from this and other shots) that websites not only seem to search flickr but rather other related articles on related websites and simply use the same photos. When the photo is used in the right context and the website itself looks professional, one might even forget the small “CC by heipei” link at the bottom and the fact that I’m an amateur spending little time or effort (much less creativity ;) on these shots. This can only lead to the conclusion that photography is as least as much simple engineering as creativity, or that I have some hidden sense for compositing an image resulting from years of experimentation, browsing flickr and doing CG where you spend a lot of time making your rendered images look like photographs.Katrin at dusk

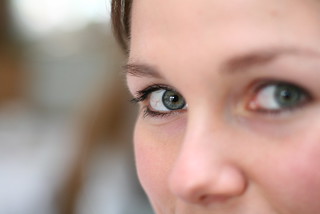
In general I’m still happy with my EF-S 18-200mm 3.5-5.6 and my EF 50mm 1.4, and the decision to buy a Speedlite was absolutely right (in fact, reviewing old shots, I’ve been kicking myself about not having bought one earlier). Apart from some crazy experiments and time-consuming handicrafted tools, my usual approach is to use the flash pointed toward the ceiling, increase it 1/3 to 1 with TTL and just fire away. If possible, a natural balance with available light will make laymen forget a flash was even used. You can go fully manual or simply use the ‘P’-mode with an appropriate aperture. A nice result can be seen on the right, though Katrin is slightly underexposed in this one. What I did was take the photo indoors (where you have your trusty white ceiling) in front of an open window at dusk. The backlight was provided by the setting sun, which adds a lot the shot and usually is done with a dedicated flash. I will be trying more of these in the future.

A little photostream-recap below, so no one can complain that I’m not blogging for the average reader anymore. Enjoy!

EasterEaster
Bunny CakeWanderung Kelmis-Lontzen-HausetWanderung Kelmis-Lontzen-HausetWanderung Kelmis-Lontzen-Hauset
Wanderung Raeren-Preuswald-DreiländereckEF 50mm 1.4 still rocks ;)

RWTH UROP: Undergraduate Research

UROPHeute haben Flo und ich unser UROP-Projekt erfolgreich beendet. Da ich, von allen Leuten mit denen ich in den letzten paar Monaten gesprochen habe, niemanden gefunden hab der überhaupt von UROP gehört hatte werde ich versuchen diese Lücke mit einem Blogpost ein wenig zu schließen. Die Details unseres Projekts werde ich ggf. in einem späteren Post erläutern.

Was ist UROP?

UROPUROP, das Undergraduate Research Opportunities Program, ist ein Förderungsprogramm für Studenten. Wie der Name verrät richtet es sich an Undergraduates, also auf das neue BA/MA-System bezogen auf Bachelor-Studenten. Das Research im Titel bezieht sich darauf dass einzelne Forschungsprojekte gefördert werden sollen. Es ist kein Research-Grant in dem Sinne wie man es vielleicht kennt: Mittel für ein Projekt beantragen und dann loslegen. UROP fördert Projekte nach ihrem Abschluss (wenn sie denn erfolgreich beendet wurden) und nach einer Evaluation der fertigen Arbeiten. Das bedeutet allerdings auch nicht dass man sich die Förderung wie ein Wettbewerb vorstellen soll bei dem die besten N Beiträge ausgezeichnet werden.

UROPAblauf

Wenn man ein Projekt gefunden hat und angenommen wurde kann man loslegen. Ob allein oder im Team ist prinzipiell egal. Zuerst muss man ein paar formale Dinge erledigen: Anschreiben, Lebenslauf, Motivationsbrief. Der Projektzeitraum ist sehr flexibel (ob ein ganzes Jahr oder nur ein paar Wochen), allerdings gibt es nur halbjährlich die Möglichkeit eine Förderung zu beantragen. Man hat einen Betreuer am Lehrstuhl mit dem man regelmäßig den weiteren Verlauf abspricht. Hat man das Projekt beendet schreibt man noch einen dreiseitigen Abschlussbericht und hält eine kurze Präsentation im Zuge des halbjährlichen UROP-Kolloquiums. Vom Betreuer (bzw. Prof. am Lehrstuhl) wird dann auch noch eine Evaluation geschrieben die direkt an UROP geht. Noch ein bisschen Papierkram und man ist fertig. Zuletzt wird das Projekt bewertet (von anderen Profs im eigenen Fachbereich) und wenn alles stimmt erhält man die Förderung (max. 2000€ pro Projekt).

Warum sollte man an UROP teilnehmen?

Das ist eine gültige Frage, kriegt man doch selbst in den einfachen HiWi-Jobs mit 8h/Woche immerhin mehr Geld, rein auf die Arbeitszeit bezogen (hey, das ist nicht meine Argumentationsweise aber solche Sachen wurde ich teilweise gefragt). Allerdings arbeitet man dabei nicht unbedingt so flexibel (was die Zeiteinteilung angeht) und zielorientiert. Wenn man nicht grade an einem guten Lehrstuhl eine Stelle bekommen hat fehlt evtl. sogar der wissenschaftliche Aspekt der Arbeit gänzlich. Die Menge der Leute die sich über das Studium beschweren weil man, selbst in Seminararbeiten oder Praktika, nur bereits Bekanntes zusammenfasst ist groß genug, so dass ich da ein gewisses Interesse vermute. Über ein UROP-Projekt kann man gut mit Mitarbeitern am Lehrstuhl in Kontakt kommen, nicht unwichtig für die spätere Wahl bei der Diplom/Master-Arbeit oder sogar bei weiterführenden Plänen (zugegebenermaßen kann man solche Kontakte natürlich auch unabhängig aufbauen, so gern sich auch alle Veranstaltungen rund um die Uni “Networking” auf die Fahne schreiben). Darüberhinaus schadet es sicherlich nicht ein abgeschlossenes UROP-Projekt auf dem Lebenslauf zu haben.

UROP Kolloquium

Warum mache ich Werbung dafür?

Wie gesagt, ich find es schade dass so wenig Leute überhaupt von UROP mitgekriegt haben. Die Fördertöpfe (übrigens im Rahmen der Exzellenzinitiative geschaffen, für alle die meinen dass Studiengebühren auf keinen Fall wieder zu den Studenten zurückfinden) sind voll und es gab bei den letzten vier UROP-Runden weniger Bewerber als Stipendien. Was das Kolloquium angeht waren die Vorträge der anderen UROP-Projekte sehr interessant. So haben wir erfahren dass manche Insekten zwar an Scheiben kleben können, um den Gefrierpunkt aber plötzlich ihre Haftfähigkeit verlieren (das ist mal über den Tellerrand geschaut für Informatiker! ;) Inzwischen gibt es sogar UROP Abroad, ein Programm mit dem man ein UROP-Projekt in den USA/Kanada verfolgen kann. Das hat bisher nur eine Person gemacht, aber die war immerhin im schönen Saskatchewan.

Wo kann man sich informieren?

Am besten auf der RWTH UROP Seite. Dort ist auch die Projektdatenbank verlinkt. Allerdings sollte man sich davon nicht abschrecken lassen. Am besten ist man spricht mit einem Assistenten oder Prof ob er nicht ein Projekt hat was gut in den Rahmen von UROP passen würde.

Image credit: RWTH UROP website

subscribe via RSS